Knowing how to pack a craft room for moving is one of the most surprisingly complex challenges in any residential relocation. From the doorway it can look manageable — a table, some shelving, a few bins of supplies. But once you actually open every drawer, cabinet, and storage cube, the real scope reveals itself: thousands of small loose items that scatter instantly, specialty tools ranging from rotary cutters to heat guns, rolls of fabric and paper that crease and crush under the wrong pressure, paints and adhesives that are both fragile and potentially hazardous, cutting mats and large flat surfaces that warp if improperly loaded, and an organizational system you have spent years building that can be undone in minutes by a single carelessly packed box. Pack a craft room without a deliberate plan and you risk losing irreplaceable supplies, damaging expensive equipment, and arriving at your new home to find that your carefully curated creative space has become a chaotic, unsorted pile.
Why the Craft Room Requires Its Own Packing Strategy
The craft room occupies a genuinely unusual category in any move. It combines the organizational complexity of a home office, the fragility of an art studio, the volume of a storage room, and the hazardous material considerations of a garage workshop — all concentrated in a single space. Most people underestimate the preparation required because individual craft supplies seem small and light. The problem is not the weight. The problem is the sheer variety, the density of small loose items, and the fact that the organizational logic holding everything together is invisible to anyone but you.
There are four specific reasons craft room packing goes wrong more often than people expect:
- Small item loss: Buttons, beads, eyelets, pins, needles, thread spools, stamps, stencils, and dozens of other tiny supplies represent hours of accumulated shopping, sorting, and organizing. Without a system that keeps these items contained and labeled through the move, they scatter into box corners, fall behind larger items, and simply disappear. Replacing a well-curated collection of specialty supplies is expensive and time-consuming.
- Delicate materials that damage easily: Watercolor paper, specialty cardstock, fabric yardage, vinyl sheets, and pressed flowers are all vulnerable to moisture, bending, and compression. A single heavy box placed on top of a flat pack of premium cardstock can render the entire stack unusable. These materials require protective wrapping and intentional box placement that most standard packing advice does not address.
- Paints, adhesives, and chemicals: Acrylic paint, mod podge, glue guns, solvent-based adhesives, spray paint, and resin products all require specific handling. Some are prohibited from professional moving trucks under hazardous material guidelines. Others can leak, freeze, or separate in transit if they are not prepared and sealed properly. Treating them the same as a box of yarn creates real risk.
- Equipment that is costly to replace: A Cricut or Silhouette cutting machine, a sewing machine, an embroidery machine, a heat press, or a lightbox can represent hundreds or even thousands of dollars of investment. These machines have internal components — blades, platens, rollers, tension springs — that can shift, crack, or misalign if the machine is not packed in its original packaging or with equivalent protection. Moving day is not the time to discover that a cutting machine's carriage is bent.
Working through the craft room in a deliberate sequence — declutter and sort first, secure small supplies second, protect flat materials third, prepare tools and equipment fourth, then handle paints and adhesives last — keeps the process controlled and ensures that your creative space arrives at your new home intact, organized, and ready to use.
Step One: Declutter, Sort, and Make Honest Decisions About Your Supplies
Before you seal a single bag or tape a single box, walk through your craft room with a clear eye. Moving is the single best opportunity to audit a collection that tends to grow incrementally over years. Dried-out paint tubes, cracked rubber stamps, half-used adhesive rolls, and fabric remnants too small for any realistic project are all worth reconsidering before you pack and carry them to a new address.
Questions to ask about each item before packing it
- Is this material still usable? Open paint bottles, dried glue sticks, and old ink pads often degrade without being obviously ruined. Test them before packing them.
- Have I used this in the past two years? Specialty supplies you purchased for a single project and never returned to are worth donating to a local school, community center, or art program rather than moving.
- Is this something I can replace cheaply if needed? Bulk items like basic cardstock, standard embroidery floss, or generic foam sheets are often not worth the box space and weight cost to move across town or across the country.
- Is this item prohibited from moving trucks? Check with your moving company before packing spray paint, solvent adhesives, or aerosol sealants. Many professional movers follow Department of Transportation guidelines that restrict flammable or pressurized products.
The goal of the decluttering phase is to reduce the volume of what you are moving before you invest time and materials in packing it. A craft room is one of the rooms where the return on the decluttering hour is highest — removing even one large bin of outdated supplies can save meaningful time and box space downstream.
Step Two: Contain and Label Small Supplies Before They Can Scatter
Small supplies are the single biggest source of craft room moving loss. The strategy for preventing that loss is containment before the box — meaning that every category of small item should be sealed into its own secondary container before it goes into a moving box. Do not rely on the moving box itself to keep small items in place.
Effective containment methods by supply type
- Beads, buttons, and small findings: Keep them in their original jars or compartmentalized organizers if possible. If they need to be transferred, use resealable plastic bags sorted by type and labeled clearly. Place bagged items inside a rigid plastic container before putting that container in the moving box.
- Thread, floss, and ribbon spools: Wind loose ends and secure with a small piece of tape or a rubber band to prevent unwinding. Pack spools vertically in a small box or bin with tissue paper between layers to prevent tangling.
- Pins, needles, and blades: These are safety items as much as organizational ones. Pins should remain in their original cushions or pincushions. Loose needles and rotary cutter blades should be capped, wrapped in heavy paper, and placed in a labeled rigid container — never loose in a bag where they can puncture through.
- Stamps and ink pads: Keep stamp sets in their original cases where possible. Store ink pads upright and sealed — many ink pads will leak if stored on their sides or upside down. Wrap individual pads in plastic wrap before boxing if there is any risk of lid seal failure.
- Stickers, die cuts, and paper embellishments: These are among the most vulnerable items to humidity and pressure. Store them flat in a labeled folder or thin cardboard sleeve inside a waterproof bag before boxing.
Label every secondary container and every bag clearly — not just "craft supplies" but the actual category: "embroidery floss — sorted by DMC number," "brass brads and eyelets," "washi tape collection." When you arrive at your new home, this labeling is what allows you to unpack and reorganize efficiently rather than spending hours sorting through mixed containers.
Step Three: Protect Flat and Roll-Based Materials
Flat materials — paper, cardstock, fabric, vinyl, cutting mats — are vulnerable to the specific pressures of moving in a way that most other craft supplies are not. They are easily creased, compressed, scratched, or moisture-damaged, and the damage is often not visible until you go to use the material for a project.
Packing flat paper and cardstock
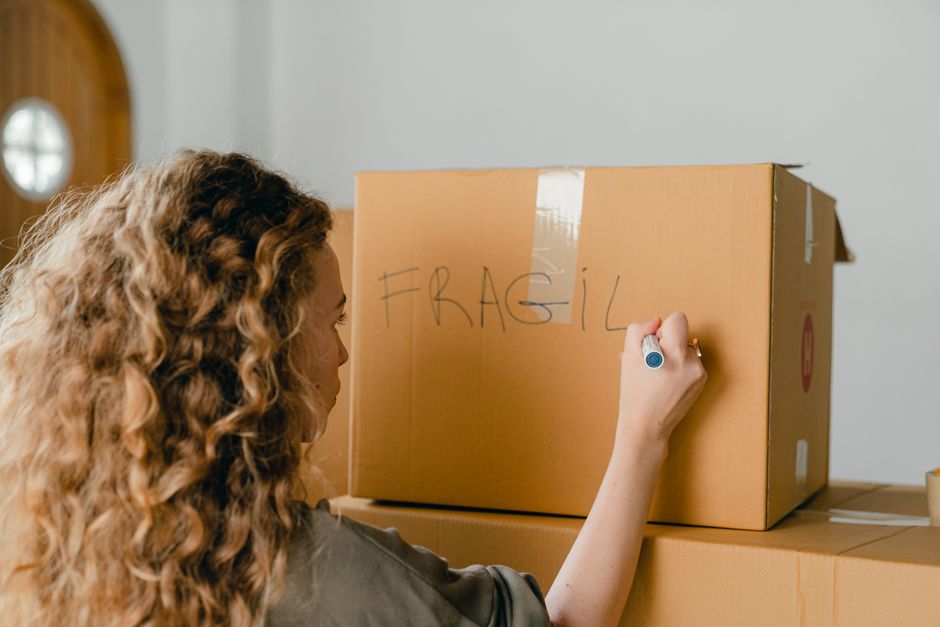
Stack paper and cardstock in small, manageable quantities — no more than a quarter-inch thickness per wrapped bundle. Wrap each bundle in unprinted packing paper and then in a layer of plastic wrap to protect against moisture. Place bundled packs flat in a wide, shallow box — never in a tall box where they will shift and slide. Pack paper-only boxes: never place heavy items on top of a paper layer. Mark all paper boxes FRAGILE — DO NOT STACK on every face of the box.
Packing fabric yardage and rolls
Fabric should be rolled, not folded, whenever possible for a move. Folding creates permanent creases in many fabrics that are difficult or impossible to press out later. Roll fabric around a cardboard tube or pool noodle, wrap the roll in plastic wrap to protect from moisture, and place it in a long, clean box. For short-term moves, clean garbage bags work as a moisture barrier in a pinch. Do not compress fabric rolls tightly — give them room to breathe.
Packing cutting mats and large flat tools
Self-healing cutting mats warp easily if bent or stored at an angle for extended periods. They should travel flat, wrapped between two pieces of cardboard and taped to secure the sandwich. Large light boxes, flat storage trays, and pegboard panels should similarly travel flat and well-padded between layers of moving blanket or bubble wrap. If they cannot lie flat in a box, secure them vertically along the interior wall of the moving truck — never flat on the floor of the truck where they risk being walked on.
Step Four: Pack Craft Equipment and Machines Properly
Electronic and mechanical craft equipment deserves the same careful attention you would give any high-value appliance. A cutting machine, sewing machine, or heat press is an investment — and moving day is when poorly packed machines sustain damage that only becomes apparent weeks later during use.
Electronic cutting machines (Cricut, Silhouette, and similar)
If you kept the original box and foam inserts for your cutting machine, use them — they are specifically engineered to protect that machine during transport. If you do not have the original packaging, wrap the machine thoroughly in bubble wrap, paying particular attention to the carriage and blade housing. Tape the carriage in its locked position if the machine has a travel lock. Pack the power cord and accessories in a clearly labeled bag inside the same box. Do not stack anything on top of the machine box.
Sewing and embroidery machines
Remove the presser foot and needle before packing — loose needles inside a machine can shift and damage the feed dogs or internal components during transit. Secure the handwheel with a rubber band or tape if the machine will be packed in a non-original box. Wrap the machine in a soft moving blanket, then in bubble wrap, and box it securely with adequate padding on all sides. Pack all attachments, bobbins, and accessories in labeled bags in the same box.
Heat presses, laminators, and die-cut machines
These machines often have flat platens or rollers that can crack under lateral pressure. Wrap heat press platens separately in bubble wrap before wrapping the full machine. Laminators should be transported with the roller gap set to its widest position to reduce tension on the internal rollers during transit. Original boxes are strongly preferred for all of these machines — if unavailable, a double-walled box with at least two inches of cushioning on every side is the minimum acceptable alternative.
Glue guns and heat tools
Allow all heat tools to cool completely before packing — this is obvious but easy to overlook on a hectic moving day. Remove any glue sticks still loaded in the gun. Wrap the nozzle end separately in bubble wrap to protect it from impact. Store glue guns and heat tools in a dedicated small box with their cords coiled and secured.
Step Five: Handle Paints, Adhesives, and Liquid Supplies Carefully
Liquid craft supplies — acrylic and watercolor paints, mod podge, liquid adhesives, fabric dye, and ink refills — are among the riskiest items to move because a single leak can damage everything in the box and anything stacked below it. Treat liquid craft supplies with the same deliberate precautions you would use for cleaning products or toiletries.
- Seal every container: Tape the lids of paint bottles, glue bottles, and ink jars with painter's tape or stretch wrap before packing. For bottles that have been opened and resealed, add a piece of plastic wrap under the lid as a secondary seal.
- Pack upright: Liquids should always travel upright, never on their sides. Use a small box or bin that keeps bottles standing vertically and surrounded with crumpled paper to prevent shifting.
- Use a plastic-lined box: Line the interior of your liquid supply box with a plastic garbage bag before placing bottles inside. If a bottle leaks, the liner contains the damage to that single box.
- Check for prohibited items: Spray paint cans, aerosol sealants, and solvent-based adhesives may be restricted by your moving company. If you are hiring professional movers, ask about hazardous material policies before packing day so you can make alternative transport arrangements for restricted items.
Loading and Transport: Protecting the Craft Room on Moving Day
How your craft room boxes are loaded into the truck matters as much as how they are packed. Small supply boxes should go in last and be placed on top of heavier boxes, never beneath them. Flat material boxes must remain horizontal and never be stacked more than one or two boxes high. Equipment boxes should be placed against the wall of the truck and secured to prevent shifting — most equipment damage during moves is caused by boxes sliding and impacting each other in transit, not by individual drops.
Label every craft room box with its contents, its destination room, and any handling instruction (FRAGILE, THIS SIDE UP, DO NOT STACK). Color-coding your craft room boxes with a distinct tape or label color from the rest of your move makes them easy to identify and prioritize during unloading.
With the right preparation, your craft room can arrive at your new home as organized and functional as it was when you left — ready to set up, not sort through.