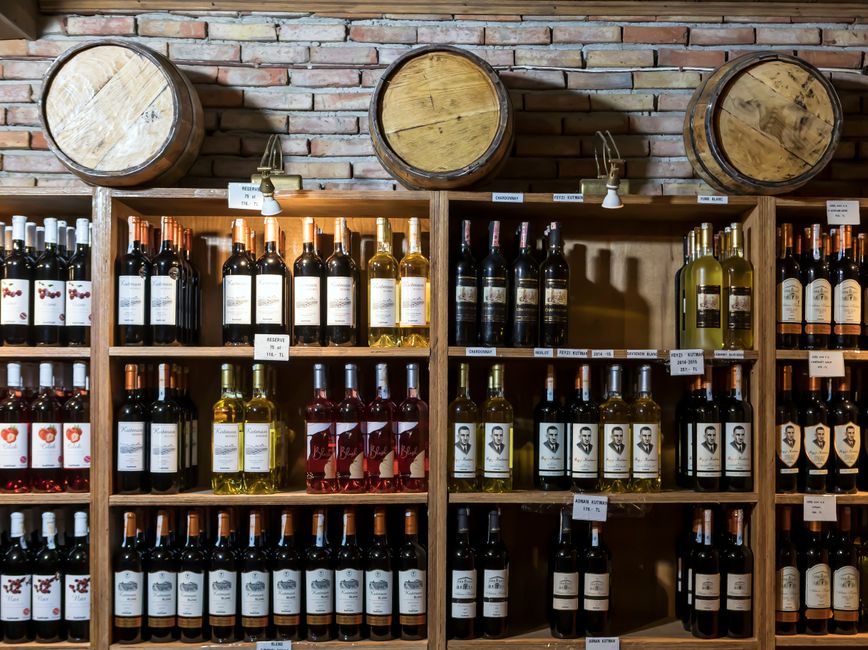
Knowing how to pack a wine cellar for moving is one of the most genuinely underestimated challenges in any residential relocation. From the doorway it can look almost straightforward — rows of bottles neatly racked, a cooling unit humming quietly in the corner, maybe a few shelves of stemware and a small tasting table. But the moment you commit to a real inventory and begin thinking through the logistics, the true complexity comes into focus: bottles filled with liquid that shifts, expands, and is irreversibly damaged by heat or vibration, custom-built or modular racking systems that were never designed to be disassembled, a climate control unit that cannot simply be unplugged and wheeled out, fragile stemware that belongs in the same space but requires a completely different packing approach, and a collection that may represent years of careful curation, significant financial investment, and bottles that are genuinely irreplaceable. Pack a wine cellar without a deliberate plan and you risk cracked corks that expose wine to oxygen, bottles that cook in a hot moving truck, shattered stemware, bent or warped racking panels, and arriving at your new home to discover that a collection you spent years building has been permanently compromised.
Why the Wine Cellar Requires Its Own Packing Strategy
The wine cellar occupies a genuinely unusual position in the home. Unlike a bedroom or a kitchen, whose contents are diverse but follow established packing conventions, the wine cellar is defined by a single overriding constraint that touches every decision: temperature sensitivity. Wine is a living liquid, and it does not forgive being subjected to heat, cold extremes, or significant vibration for extended periods. That constraint shapes how you pack, when you move, what vehicle you use, and how quickly the cellar needs to be reassembled and cooled at the other end.
There are four specific reasons wine cellar packing goes wrong more often than people expect:
- Temperature damage during transit: A standard moving truck is not climate-controlled. On a summer day, the interior of a closed truck can reach temperatures that would ruin a bottle of wine within hours. Even in mild weather, temperature fluctuations during loading, transport, and unloading create stress on corks and accelerate chemical reactions inside the bottle. Most people do not plan for this until it is too late.
- Vibration that disturbs sediment and structure: Road vibration over a long haul can agitate sediment in aged wines, disrupting the bottle's internal chemistry in ways that may not be apparent until the wine is opened months later. This is particularly significant for older vintages, which may need weeks of rest after transport before they are ready to drink.
- Racking that was never meant to move: Many wine racks — particularly custom-built or permanently installed systems — were assembled in place and have no straightforward disassembly path. Modular systems are more forgiving, but even they require careful documentation of configurations before disassembly begins. Built-in racking often involves anchoring hardware, electrical connections for lighting, and finish work that connects to the surrounding wall.
- Cooling equipment with specific disconnection requirements: Wine cooling units — whether through-wall, ducted, or self-contained — cannot be simply unplugged and moved without preparation. Refrigerant lines, condensate drainage, and electrical connections all require specific handling, and the unit needs time to stabilize after reinstallation before the cellar reaches its target temperature again.
Supplies You Need Before You Start Packing the Wine Cellar
Gathering the right materials before you open a single bottle of wine for packing will save you significant time and prevent improvised decisions that lead to damage. The wine cellar requires a more specialized supply list than most rooms in the house.
Wine-Specific Packing Materials
- Divided wine shipping boxes: Purpose-built wine shipping cartons with individual cardboard or styrofoam cell dividers are the single most important supply for this job. Each bottle sits in its own cell, isolated from every other bottle, which eliminates the bottle-against-bottle contact that causes breakage. These boxes are available from moving supply retailers, wine shops, and online — source them before packing day, not on it.
- Styrofoam wine shippers: For particularly valuable or fragile bottles, styrofoam wine shippers with molded cavities offer superior insulation and cushioning over standard cardboard cell dividers. They also provide a modest degree of temperature buffering during transit.
- Stretch wrap and moving blankets: For racking panels, tasting furniture, and the cooling unit exterior.
- Resealable zip-top bags and permanent marker: For hardware from racking disassembly — screws, bolts, and mounting brackets sorted and labeled by rack section.
- Padded stemware boxes or cell dividers: For any wine glasses or decanters stored in the cellar.
- Permanent marker and box labels: Every wine box needs directional labels — This Side Up is not optional for wine transport.
- Digital thermometer: For monitoring the cooling unit's recovery progress at the destination.
Planning Supplies
- A clipboard or phone for an inventory list — catalog every bottle before packing begins, noting varietal, vintage, and approximate value for insurance purposes.
- A camera or phone for photographing racking configurations before disassembly.
How to Pack Wine Bottles for Moving
The bottle itself is the central concern of every decision in this process. Approached correctly, even a large collection can be transported safely. Approached carelessly, a single tipped box can result in thousands of dollars in losses.
Step 1: Inventory and Prioritize
Before a single bottle leaves the rack, conduct a complete inventory. List every bottle, note its approximate value, and flag any bottles that are especially fragile due to age, fill level, or cork condition. Older bottles with fragile corks, bottles that are already slightly ullaged (low fill level), and bottles with damaged labels or loose capsules all deserve extra individual attention during packing. This inventory also serves a practical insurance purpose: if anything is damaged in transit, you need documentation of what was there before the move.
Step 2: Time the Packing Around Temperature
Do not pack wine bottles into boxes and leave them in a warm room for extended periods. Pack the cellar as close to loading day as possible, and plan for the boxes to go directly onto the truck rather than sitting in a staging area in a warm part of the house. If you are moving during summer months or to a location with significant climate differences, seriously consider whether a temperature-controlled moving vehicle or a professional wine shipping service is the right choice for all or part of your collection.
Step 3: Pack Bottles Horizontally in Divided Boxes
Wine bottles should travel horizontally, just as they are stored — this keeps the cork in contact with the wine and prevents it from drying out and allowing air into the bottle. Place each bottle in its own cell in a divided wine shipping box. Never place bottles vertically unless the box is specifically designed for upright shipping and the bottles are sealed with synthetic corks or screw caps. Fill any empty cells with crumpled packing paper to prevent remaining bottles from shifting.
Step 4: Label Every Box Correctly
Every wine box must be labeled on the top and all four sides with: the contents (e.g., "Wine — Burgundy, 2015–2018"), a This Side Up directional arrow, a Fragile notation, and a handling note such as "Do Not Stack More Than Two High." Heavy wine boxes have a tendency to get stacked aggressively on the truck — clear labeling is your only defense against that happening.
Step 5: Load Wine Boxes Last, Unload First
In the truck, wine boxes should ideally be loaded last so they are positioned near the door and unloaded first at the destination. This minimizes the time bottles spend on the truck and allows you to get them into a cooled environment as quickly as possible. Never place wine boxes under heavy furniture or other items that will stack weight on them.
How to Disassemble and Pack Wine Racks
Wine racking is among the most variable furniture categories in any home. A freestanding modular rack disassembles entirely differently from a custom-built floor-to-ceiling system, and both are different from a commercially installed through-wall unit with integrated lighting. Approach racking disassembly methodically and allow more time than you think you need.
Photograph Everything Before You Start
Before removing a single bottle from the rack — and certainly before loosening any hardware — photograph the racking system from every angle. Capture close-ups of how sections connect, how the rack meets the wall or floor, and any lighting, electrical, or climate integration points. These photographs are your reassembly reference and will save hours of guesswork at the new location.
Modular Rack Disassembly
Modular racking systems typically use interlocking panels, pins, or stackable cube units. Disassemble from the top down, keeping all hardware from each section in its own labeled zip-top bag. Wrap individual panels in moving blankets or heavy cardboard to prevent surface scratches. If panels are made of wood, avoid stacking them flat under weight, as this can cause warping during transit. Label each panel or section with a number that corresponds to your reassembly diagram or photographs.
Custom or Built-In Racking
Custom-built or permanently installed racking systems present a more significant challenge. In many cases, these systems were built in place and genuinely cannot be moved intact. If your racking is anchored to the walls or ceiling, involve a carpenter or the original installer in the disassembly to avoid damaging the structure and to preserve components for reinstallation. Document all mounting points and note wall stud locations if you plan to replicate the configuration in the new space.
Packing Racking Panels
Wrap individual racking panels or sections in moving blankets and secure with stretch wrap. For wooden racks, avoid direct contact between wood surfaces during transport — a single sheet of cardboard or moving blanket between stacked panels prevents finish damage. Pack hardware bags in a clearly labeled small box that travels with the rack panels, not in a random general packing box.
How to Handle the Wine Cooling Unit
The cooling unit is the single most logistically complex item in the wine cellar. Depending on the type of system installed — through-wall, split-system, or self-contained — disconnection and reinstallation may require professional assistance, and the unit will need time to re-stabilize at the destination before your collection is fully protected again.
Consult the Manufacturer or an HVAC Professional
Before doing anything to the cooling unit, consult the manufacturer's documentation or speak with an HVAC technician familiar with wine cooling equipment. Through-wall and split systems in particular involve refrigerant lines and condensate drainage that must be handled correctly — improper disconnection can damage the unit and may raise safety concerns. Do not assume that disconnecting a wine cooling unit is equivalent to unplugging a standard appliance.
Allow Time for the Unit to Equalize
After disconnection, most cooling units need time to equalize internal pressure before they can safely be transported. The manufacturer's documentation will specify this period — it is typically at least 24 hours for compressor-based systems. Plan your cellar packing timeline around this requirement, not the other way around.
Protect the Unit During Transport
Once cleared for transport, wrap the cooling unit in moving blankets and secure with stretch wrap. If the unit has a compressor, transport it in the upright position unless the manufacturer specifies otherwise — transporting compressor units on their sides can cause oil migration that damages the compressor. Keep the original packaging if it is available, as it is designed specifically for the unit's dimensions and fragility profile.
Plan the Reinstallation Timeline
At the destination, the cooling unit should be reinstalled and powered on as early as possible — ideally before the wine bottles arrive in the new space. The cellar will need time to reach its target temperature and humidity before the collection is fully protected. In hot weather, this planning detail is not optional; it is the difference between a safe collection and a damaged one.
Packing Stemware, Decanters, and Cellar Accessories
Wine cellars often hold more than just bottles and racking. Stemware, decanters, wine keys, pourers, tasting notes, and small furniture pieces all need to be packed — and each has its own requirements.
Stemware
Wine glasses are among the most fragile items in any home. Each glass should be individually wrapped in packing paper — not newspaper, which transfers ink — with the stem given particular attention. Cell-divided stemware boxes are strongly preferred over improvised alternatives. Place glasses upright in their cells, not inverted, unless the box is specifically designed for inverted storage. Never stack heavy items on top of stemware boxes.
Decanters
Crystal decanters require individual wrapping in packing paper or bubble wrap, with particular attention to the neck and stopper. If the stopper is removable, wrap it separately and label it so it does not get lost in the box. Pack decanters in a box with generous padding on all sides — they should not be able to shift even slightly within the box.
Tasting Table and Furniture
Small tasting tables, bar stools, or bistro chairs stored in the cellar should be disassembled where possible, with hardware bagged and labeled. Wrap finished wood surfaces in moving blankets. If chairs have upholstered seats, wrap them in plastic or stretch wrap to protect from dust and moisture during transit.